Japanese Ha-Go type 95 light tank conservation
History and research
Dean Willis, LTO conservator, Australian War Memorial
The type 95 Ha-Gō tank was produced in Japan between 1935 and 1942, with an output of some 2,300 tanks. The Ha-Gō is considered a light tank in comparison with other tanks manufactured during the Second World War. With a fighting weight of around 9 tons, it was easy to transport to various islands around the South Pacific and could negotiate the small tracks and paths usually found on such islands. The armour plate is about 1/2 inch or 13 mm thick at most points around the tank. The hull is held together using the hot rivet method, with nuts and bolts for the areas on the hull that required regular removal. The engine is a Mitsubishi 6-cylinder air-cooled diesel engine which produces 120 horsepower. The engine is located on the proper right side of the tank at the rear of the hull (“proper” describes a side of the vehicle from the driver’s perspective). Attached to the crankshaft are a clutch and transfer box that bring the power line back to the centre line of the hull. From this point a drive shaft connects the transfer box to the gearbox and front differential, where the engine power is applied to the tracks. There are one reverse speed and four forward speeds, giving the Ha-Gō a top speed of 28 miles per hour (45 kph).
The cooling air is supplied via a large barrel-shaped ducted fan connected to the crankshaft of the engine. The air is circulated through steel ducting covered with cork for noise absorption. Air is drawn in through a large vent on the top of the engine cover into the ducted fan and then pushed around the engine, and hot air exits the proper right side vent just before the muffler. The suspension contains 4 sets of bogie wheels which are each supported by a single bell crank; the bell cranks are connected to 4 compression springs (two each side) that control the ride.
The turret is offset on the hull to the left side. This area of the Ha-Gō contained three crew: a driver who sat in the front proper right side of the hull; a gunner/mechanic who operated the 7.7-mm machine-gun in the lower portion of the hull in the proper left side; and the commander who stood behind the driver in the turret. There were two 7.7-mm machine-guns used in the Ha-Gō: one on the proper left side facing forward, and the other facing rearward out the of the turret. Also inside the turret was a 37-mm main gun, which made entry and exit difficult through the top hatch. The interior is very cramped, especially with the guns protruding into the cabin.

The Memorial’s Ha-Gō
The battle
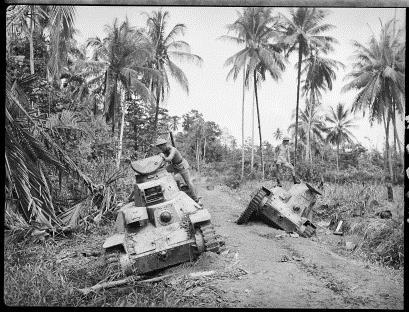
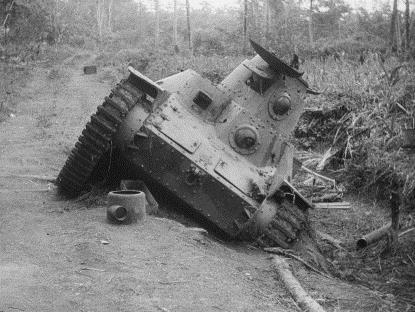
Only two Ha-Gō tanks were landed at Milne Bay on 25 August 1942 to support the Japanese marines; they were first spotted by Lieutenant Bert Robinson and his men, east of Rabi. Both tanks were firing into the bush on either side of the road, with Japanese troops following, all travelling towards Robinson’s group. The following day Robinson shot and killed the commander in one of the tanks while it was crossing a small timber bridge, but it is impossible to determine which of the two tanks that was.
In the battle for KB Mission, both tanks were used with their lights switched on in an attempt to drive over the Australian troops who were dug in, in shallow trenches. The Australian troops used sticky bombs, designed to adhere to the side of the tank before exploding – but all failed to work. The Australians also directed small arms fire from .303s at the tanks, the evidence of which is still visible today. The tanks eventually won the day, and by midnight they had taken control of the battle.
By 2 in the morning the tanks, now at Gamma River, were again met by the Australians – but this time they had a Boys anti-tank rifle. Corporal John O’Brien soon put it to use against the approaching tanks. O’Brien managed to fire three shots at the tank before he was wounded by a grenade; for this action, he was awarded the Distinguished Conduct Medal. Evidence of the action is still present today on the Memorial’s Ha-Gō. A short while later, news came through that both the Ha-Gō tanks had been discovered bogged and abandoned on the road between Rabi and KB Mission, much to the relief of the Australians.
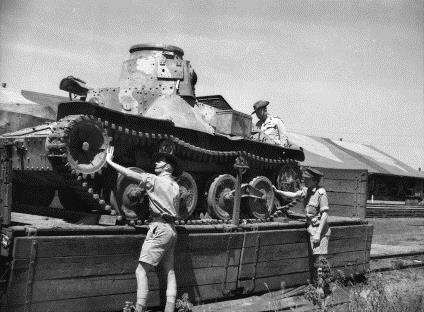
A team of mortar men was sent to the tanks; using explosives, they blew the tracks off both tanks to disable them in case the Japanese surged forward again and recaptured them. The tanks were left by the side of the road for a short time and were heavily raided by Australian troops for souvenirs; eventually both tanks were removed and loaded onto barges for the trip back to Australia.
The Memorial’s Ha-Gō was test shot with a Boys anti-tank rifle to ascertain the damage that could be done; this most likely happened in New Guinea. The test areas include proper right side front track section, proper left front bow-plate casting, and main gun. Once in Australia, many military ordnance tests were performed on the Ha-Gō to ascertain the best way to knock them out. The Memorial’s Ha-Gō was dragged over anti-tank mines to check the effectiveness of these ordnances. The damage from these tests is still visible today: there is a large crack at the rear of the turret, which occurred when the turret was blown off during one these tests.
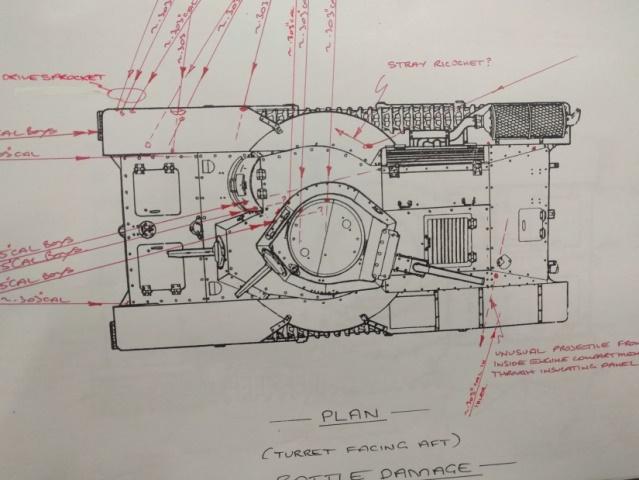
Map of bullet trajectories
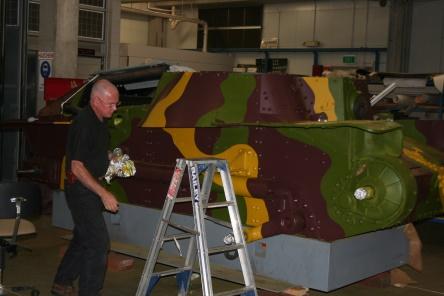
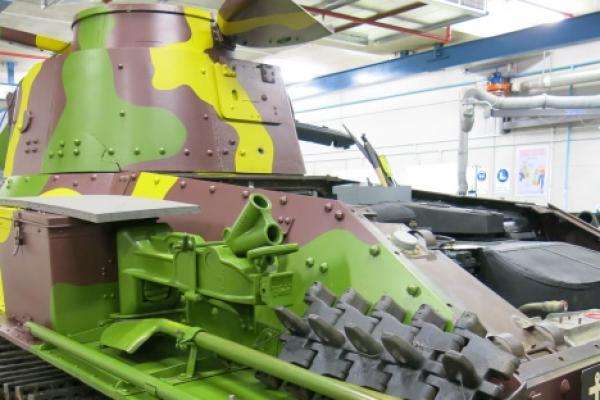
Further damage includes a large crack in the hull, proper right side midway. The right hand rear bogie was blown off, along with the muffler, and right rear track guard. The idler wheel and axle were bent to a 45 degree angle by the blast. The colours and camouflage pattern shown in the pictures below were made by a previous owner and are incorrect.
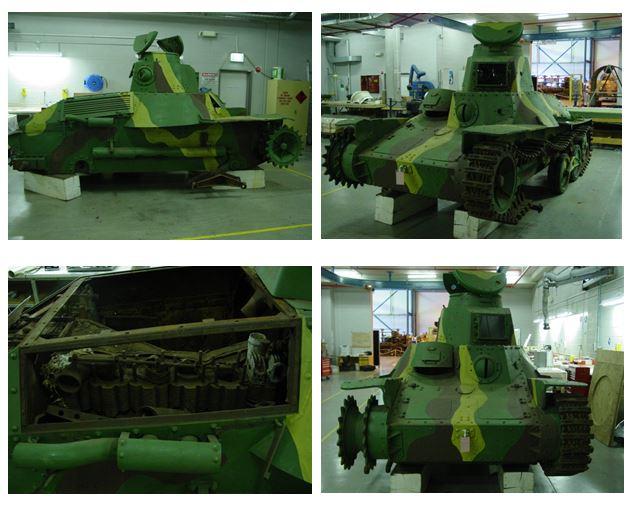
The starting point...
The engine and hull interior were the next components that required treatment. The engine was wire-brushed and scraped on the outside to remove the large build-up of iron corrosion. The interior floor of the hull underwent the same process. Tannic acid was used to neutralise the corrosion.
Some 92 kilograms of corrosion deposits (rust) were removed from the engine and floor of the Ha-Gō. We began sifting and sorting through the deposits, looking for items of interest that might help tell the story of the Ha-Gō. Some objects were found: three shells from the 7.7-mm machine-gun, a cover for the inlet manifold, and an Australian nurse’s hat band.
Both the engine and the hull floor were now ready for paint. The engine was painted with an acrylic matt black paint, and the hull floor painted in silver, matched to original samples retrieved from inside the Ha-Gō. The floor was painted to simulate natural wear and ageing; this allowed the contrast between the original wall paint and the new floor paint to become less noticeable.
Re-fitting out of the Ha-Gō begins
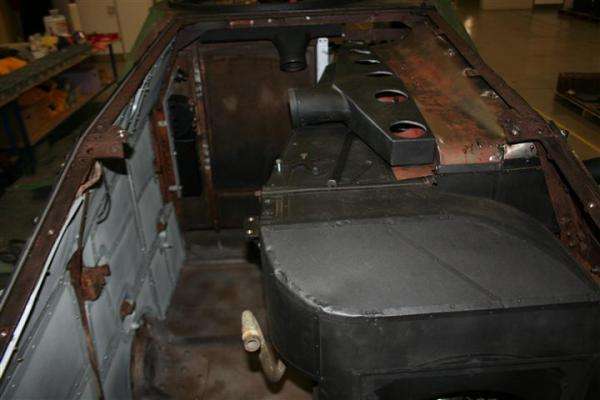
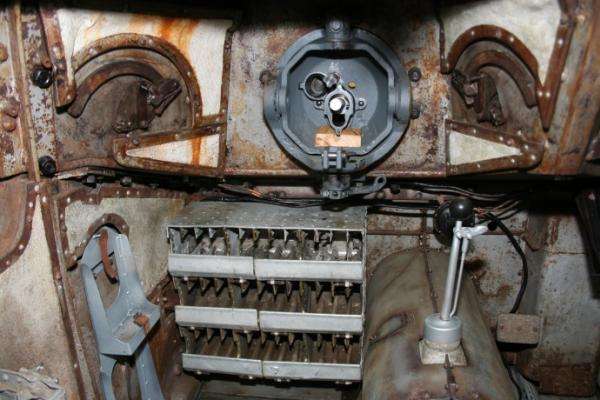
From the inside rear, looking forward. The black object on the right is the engine and cooling duct, refitted in position. Silver mesh on the left side originally held compressed organic material, such as palm fronds and grasses, to absorb engine noise and heat. Note the floor paint treatment.
Note how the engine is off-set from the centre line of the hull; a transfer box brings the engine power to the centre of the hull, and then attaches through a drive shaft to the gearbox and front differential. Brakes are located on the front differential and are of the external contracting band type.
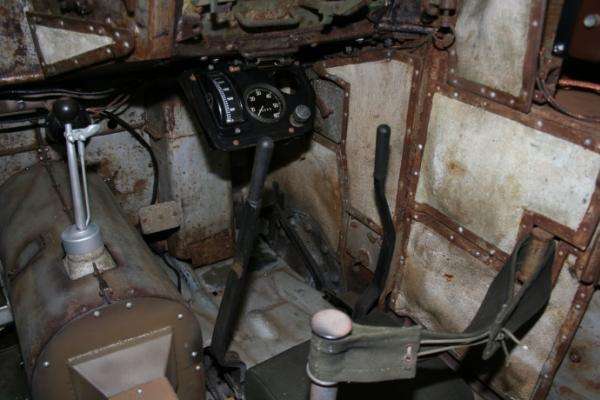
The driver’s position on the forward right side of the hull. The Ha-Gō uses skid steering to turn. In this system, turning is achieved by braking one track and allowing the other to run faster. The two black steering levers can be seen along with the brake and clutch pedal on the floor. The dashboard contains a speedometer (round gauge), tachometer (narrow rectangular, vertically-oriented gauge) and starter switch. The gear stick is to the left of the driver, and selects 4 forward speeds and one reverse. The area for the driver is very small.
The machine-gunner/mechanic’s position in the hull to the left side of the driver. The 7.7-mm machine-gun is mounted in the centre ball-turret and protrudes 75 cm back into the cabin, taking up some valuable internal space. The machine-gunner knelt on the floor to operate the machine-gun; behind him was the door into the engine compartment and the main battery isolation switch.
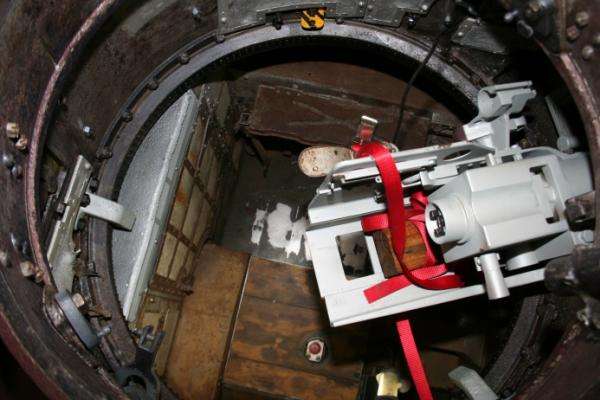
Looking down through the top hatch: the commander operated from this position. He would stand on the wooden flooring cover (bottom edge of picture) to look out of the turret lid; in battle he would close the hatch covers and stand on the actual floor of the tank, to use either the 7.7-mm machine-gun or 37-mm cannon. The new grey object on the right is a replica of the cannon breech.
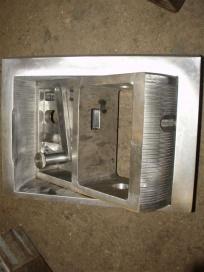
Many components for the restoration were made in-house at the Australian War Memorial; here is a sample.
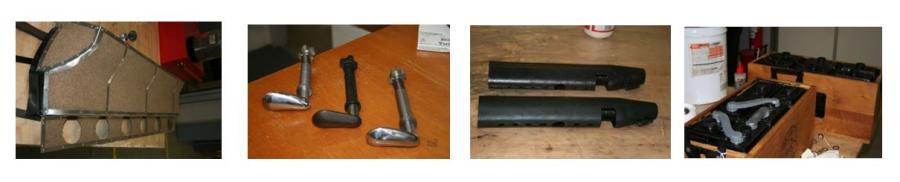
Cooling ducts were all replaced / Ball turret eye slot covers; original in centre / 7.7-mm machine-gun shrouds, original at top / replica batteries, 6 volts

New floor sections / Batteries isolation switch / Engine cooling ducting, two images
With the interior now 80% complete, attention was turned to the external surfaces of the Ha-Gō. Many primary-source photographs exist of the Memorial’s Ha-Gō, and these were used (along with residual original paint on the hull) to determine the colours that were used and the pattern of the camouflage scheme. Some original paint has been retained on the front and rear bow-plate, along with some Japanese manufacturers’ writing in orange paint. Areas on the turret and main body of the hull bear original paint samples with Australian signatures and service numbers scratched into the paint surface; these were carefully traced onto a durable Mylar sheet. The remaining paint evidence on the Ha-Gō, along with primary source images, helped to determine 90% of the camouflage pattern.
Three photographs were used to help determine camouflage location and pattern. Memorial’s tank is the more distant, and in centre photograph.
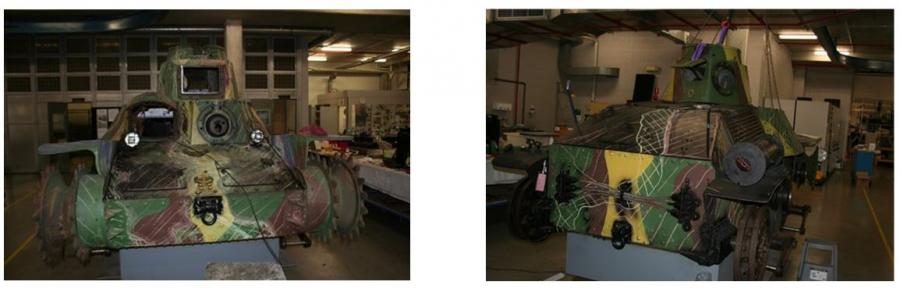
What we knew about the camouflage pattern was drawn onto the Ha-Gō using coloured chalk. The colours seen under the chalk, and in the photographs above, were applied well after the Second World War by the previous owner, and are not correct. In the 10% of areas where the orinal pattern was unknown, the areas of colour were linked up to achieve a match the likely original scheme. The chalk marks were transferred to Mylar sheets using permanent markers in red, green and yellow. Mylar is used to create a permanent record, and also to help locate the camouflage pattern on the hull when applying the new coats of paint. Original paint samples on the hull were left in situ and painted over to consolidate the samples, as the old paint was quite brittle and falling off.
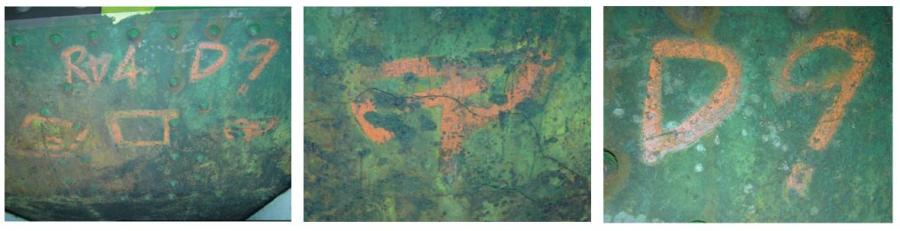
Some original paint and manufacturing writing, on the bow-plates.These were left in original condition and painted around
The next process was to add the new colour-matched paint. Working through the paint layers, the order in which the colours had been applied originally was determined. It was found the the Ha-Gō had been painted with a complete coat of green first, followed by the areas of mahogany brown, and finally the yellow. They were unusal, bright colours that provided very effective camouflage in the jungle.
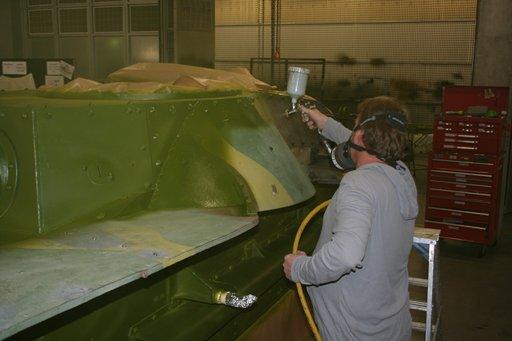
First coat of green being applied by spray painting.
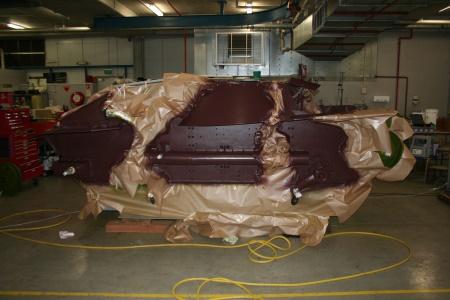
Green camouflage masked off to expose areas to be painted mahogany brown
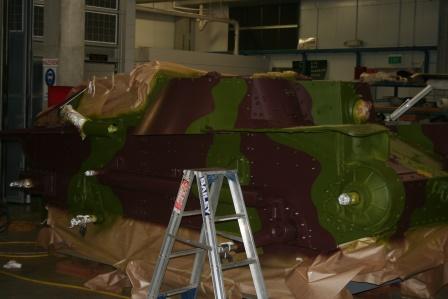
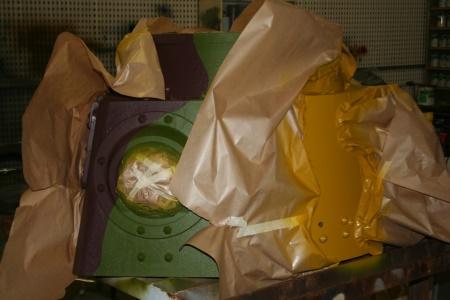
In the last stage, the yellow is applied through the same masking process; the final result with all masking removed.
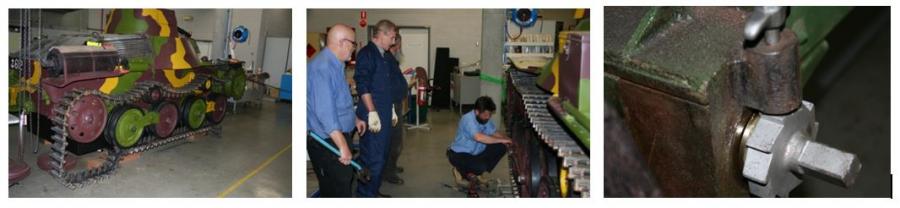
Time for reassembly
The exterior of the Ha-Gō was now in the process of reassembly. Larger interior components were fitted before the turret went on. The turret was placed on the hull, with 100 new 25-mm steel balls for the turret to rotate on; the guides and turret locks were fitted to keep the turret in position. Next it was the turn of the idler wheels, bogie wheels, drive wheel and the fitment of the tracks.
Proper right side of the Ha-Gō: large idler/adjustment wheel at rear in mahogany brown;
Bogie wheels x 4 lower hull, two idler wheels yellow and mahogany brown, with track resting on them; the green front drive wheel, with teeth.
The track was pulled through under the bogie wheels. The entire length of track was drawn over the idlers gears from the rear, until the two ends met; then the track pins were inserted and the track was joined to form a loop. The tracks were adjusted, using the adjusting ratchet mechanism at the rear of the tank, which increases the distance between the front drive wheel and the adjust/idler wheel at the rear, thus tightening and locking the tracks. The track was fitted in the same manner on each side.
The replica 37-mm cannon was fitted into the turret, along with the two 7.7-mm machine-gun shrouds. The 37-mm was fitted in the same way as the original in a movable mantlet, held in place with two threaded pivots. Fake gun-barrel muzzles were manufactured to hold the shrouds in situ.

37-mm main gun fitted to the Ha-Gō
New mantlet
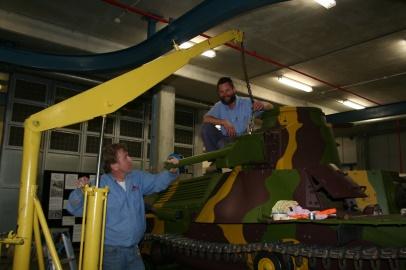
Replica 37-mm gun being fitted to the turret
The service equipment – jack, crowbar, spare track, pick and shovel and toolbox – were added to the proper left rear track guard. Now with the Ha-Gō 99.9% finished, all that was required to complete the project was fitting the rear tail light. Job done and dusted.
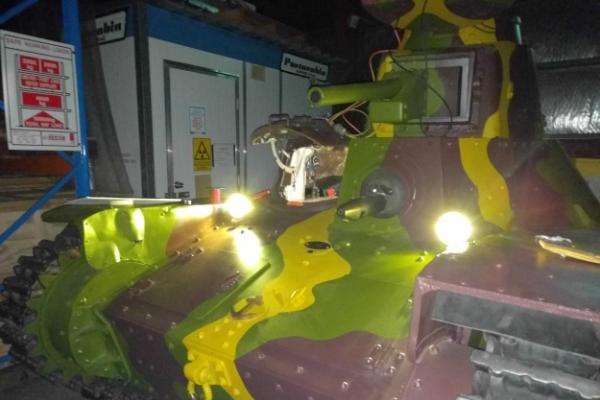
Some work was required to prepare the tank for display. This included adding power to the two front headlights, lightly rubbing down the paint work to dull it slightly, and finally the process of installing the Ha-Gō into its display position in the Memorial’s Anzac Hall.
Some unusual hidden aspects of the Ha-Gō were found during the conservation process.
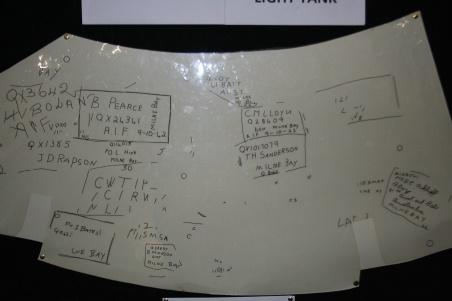
Signatures of Queensland troops, traced onto Mylar
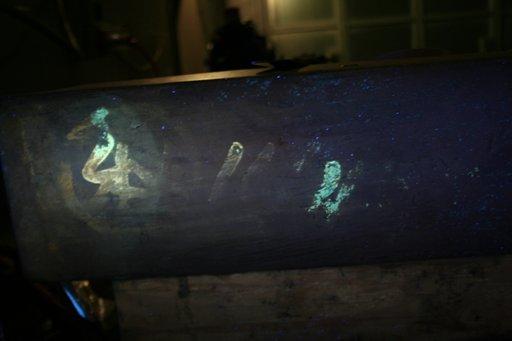
Japanese manufacture markings flourescing under UV light, on the bottom of the oil cooler
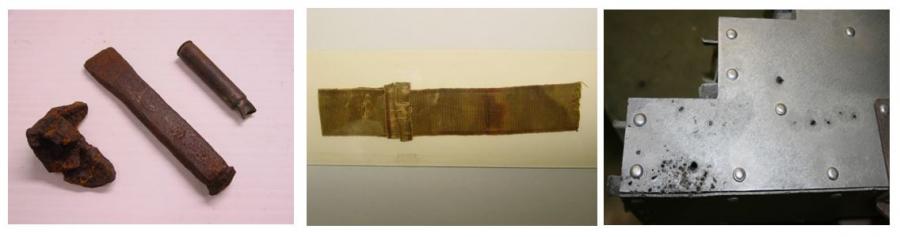
Small tools and a 7.7-mm shell / Australian nurse’s hat band / Projectile damage on shell bin, behind the driver
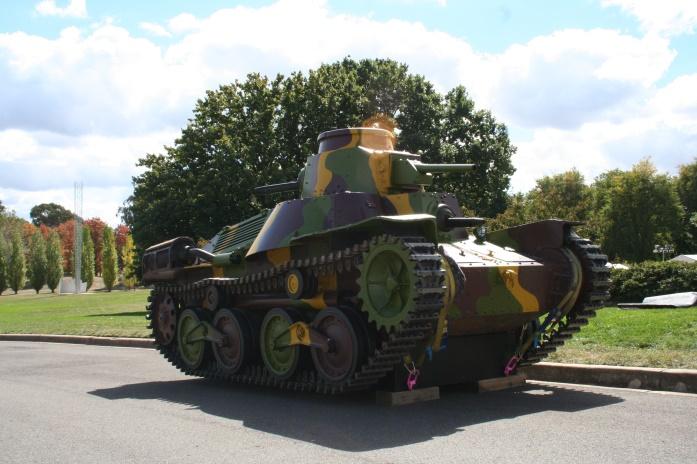
Ha-Gō with a bit of greenery behind: the camouflage works?
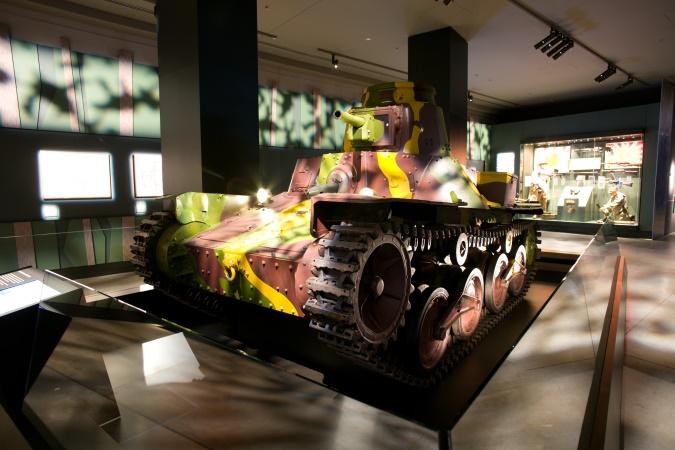
The Ha-Gō on display in Anzac Hall
When you visit the Memorial and the Ha-Gō display, look for the things mentioned here. There are several large bullet holes of .55 inches. Some of this is damage from action (when the tank was attempting to run over men lying on the ground, who were firing at an angle upwards) and some from later testing. Also look for small-arms (.303) fire damage on the hull and the front track guards. On the left side of the hull in front of the muffler there is a rather large crack that starts on the hull and travels down and right under the Ha-Gō; also see the cracks at the rear of the turret lower edge. The evidence is everywhere, so come and have a look at the Australian War Memorial.
Staff and volunteers involved in the conservation of the Ha-Gō:
- John Kemister – Senior Large Technology Object conservator, project leader
- Dean Willis – LTO conservator
- Andrew Schroeder – LTO conservator
- Mike Etzel – curator
- Nigel Nolan – volunteer
- Dennis Wilks – Volunteer
- Brian Ewens – volunteer
- Ian Smith – volunteer